Posts

Showing posts with the label sewing techniques

Self-made Bias Tape Facing In 10 Easy Steps

Image
Hello all. this is the second post on Bias Facing. Here, self-made bias that is cut out of the shell/self/design fabric is used. This example only shows Bias Facing "in the round" since its basically the same thing as "in the flat". Please check previous posts here and here to understand what I mean by "in the round" and "in the flat".

Bias Facing 1

Image
The post today is on "bias facing". this is an edge finishing technique that is often wrongly described as "bias binding" which was treated in a previous post . Using pre-made bias-binding tape. The bias tape here is and 1/2" single fold tape i.e it appears as half an inch on the roll but when opened up, it measures 1" with two fold lines, splitting it into 3 panels. This is the commonest type in Nigerian markets.

Bias Binding Tutorial

Image
This is a type of edge/hem finishing, this tutorial shows how to sew a bias binding. It can be used at the neck, hem, armholes etc or even to finish a seam where it is known as "Hong Kong" finish. Bias tapes can be brought ready-made or you can make your own. Today's sample is made using pre-made post. A bias binding that will finish 1/4" when bound will measure a total of 1" tape when unfolded (i.e 1/4"×4): in the same vein, a bias tape that will finish as 3/8" will measure 1.5" when unfolded. The most common bias tape in Nigerian markets measures 1" when unfolded and will finish 1/4" when used for binding. This type is actually called "1/2 inch single fold bias tape" because it measures 1/2" till when unfolded. It should be noted that an edge to be bound doesn’t require seam allowance, as sewing a binding merely wraps (or binds) around that particular edge and doesn’t take in any seam allowance. You can sew a bia...

Sewing a French Seam

Image
A French seam is a self-finishing kind of seam whereby all the raw edges are totally enclosed within the seam. It is a seam that is hardly used in mass manufactured clothing but used in high end garments and it can be easily achieved. Maybe you have even used this technique before without knowing what it is called. It is often used in sheer fabrics and light weight fabrics such as chiffon. You don’t want to use this in a fabric such as denim because of how bulky it will be. Our soon to be released pattern makes use of this seaming and finishing technique and here is a tutorial on it.

How to Sew Accurate Seam Allowances Part 2

Image
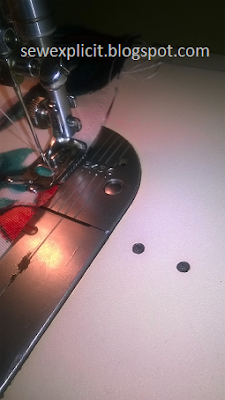
In continuation of the previous post , I will be sharing my method of making a seam guide on the popular " black-head" sewing machines. What you need: 1.        A pair of divider (from your maths set) 2.        Removable ink marker 3.        Steel/plastic ruler

Sewing Accurate Seam Allowances

Image
So a pattern calls for 1/2" sewing allowance, how do you ensure your seams are exactly 1/2"? Eyeball? Use chalk to mark all the way down? Simple, use seam guides located on your sewing machines. The presser foot: you know this can be used as a guide right? The distance from the needle to the edge of the presser foot is a specific amount. For instance

How to Sew an Invisible Zip and make it truly Invisible

Image
How do you sew and make an invisible zip truly invisible?  the best way to truly make it invisible is to use a zipper foot. There is a presser foot specifically  designed for inserting invisible zips but the one that I have used is an ordinary  zipper foot. While searching for images, my search revealed that what I have is actually a piping foot or is it an elastic foot?